
I had a box of slides. I had to return it to my friend in Geneva. What would I do? Initially, I was just going to get them duplicated. But years passed, my guilt about holding on to the slides grew, and technology advanced. So, I decided to scan the slides, burn them onto CDs and put them on the Web.
It took quite a while to go from the decision to scan the slides to actually doing it. Some of the delay was due to immature software, but some of it was due to just getting educated.
This document is intended to make this process easier for others in the future. It discusses all of the issues involved including obtaining hardware, software, and developing technique. It is aimed at the home tinkerer who is interested in getting up and running. Professionals are invited to laugh and pepper me with advice. It is also geared towards Linuxheads. Windows users are also encouraged to glean knowledge, but they are also encouraged to stop buying Microsoft products.
With scanners, you get what you pay for. You can buy print scanners, slide and negative scanners, and scanners that do all three. The first thing to do is go over to Tony Sleep's site and check out the scans that the various scanners produce. If you're running Linux, your choices will be limited to a number of supported scanners. After your visit, you might think I think the choice of cereal at Safeway is limited too.
My buddy Dan Heller, who got me started in this great adventure, uses the Sprintscan 4000, which is the successor to the 35+, which was also really good. He says, "With 4000 dpi, you can print up to 20x30 images and they're as sharp as a tack."
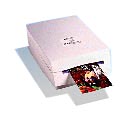
Me, I just want to put pretty pictures on the Web, so versatility and value were my priorities. I chose the HP Photosmart since it does slides, negatives and prints (up to 5x7). It is of surprisingly good quality considering it is one of the lowest priced slide scanners ($300). It is not the best at peering into the shadows though.
Since the USB ports are not yet well supported under Linux, get the SCSI model which you can order directly from HP. Since the SCSI bus dials down to the lowest common denominator, be sure to hang the scanner off of a different SCSI controller than your disks so you do not slow down your disk I/O.
Under Linux, the best choice is SANE. The Debian Linux distribution, at least, has a SANE package. This package contains software that talks to various scanners and a couple of rudimentary frontends. Be sure that you are using at least version 1.0.2 of SANE; I found that the HP backend in previous versions produced very dark images.
The frontend that I use to drive the scanner is Xsane. Comments about Xsane in this paper are for version 0.71 except as noted.
Another piece of software that I discovered is SCARSE. It is used to calibrate your scanner. However, I find that the auto-adjust feature in Xsane is good enough for most purposes.

To manipulate the images, I use the GIMP (GNU Image Manipulation Program). This is essentially a Photoshop look-alike. The ImageMagick package is also very, very handy.
If you want to put your raw, high resolutions on CDs, you can use xcdroast. There should be a package for your Linux system.
I generally do not use gloves since the slide mounts are sufficient to allow handling of the slides without fingerprints. However, when I am sorting the slides (like a deck of cards), or when I need to re-center the slide, I wear latex gloves to protect the slides against fingerprints.
I find that even if I'm loading the processor, the scans come out just fine. Once when my space heater clicked on, the scan came out terrible though.
On the other hand, burning a CD requires a quiescent system. I have seen problems when I was doing some crunching. Background Sendmail and Apache processes are OK though.
I am a heathen and simply pant on the slide and then wipe it carefully with a soft cotton handkerchief. This cleans up the fingerprints nicely and has not scratched a slide. There are commercial clean-up products available.
While holding the slide vertically, wipe the slide in several downward strokes of a slide cleaning brush to remove or loosen the dust. Tilt the slide towards a window or bright light so that you can see the little spots of dust. Do not press too hard or you may scratch the slide. I sometimes find that this step is optional and that the next step--blasting the slide with air--is sufficient.
Blast each side of the slide with several blasts from an air bulb to remove any remaining particles of dust. Keep blowing until all of those spots are gone, or you'll be forever in the GIMP touching up the images. You may have to hit some stubborn pieces of dust with the brush again. Repeat until the slide is immaculate.
Plug for the environment: I very rarely use compressed air for this step because it is almost never necessary, and it is not worth the removal of mountains due to strip mining for the metal and the obliteration of open space or pollution of waterways with empty cans.
Xsane and scan.
If you are including the entire slide, place the outline just inside the dark area of the slide to ensure that you do not get any ugly black lines at the edges of your image.
This does a pretty decent job of adjusting the colors. Sometimes I will increase or decrease the contrast a notch or two to hide defects in the sampling or enhance the image. If the slide is unusually light or dark, I may adjust the gamma too.
During this time, you can update your index file, if you have one, or read some email.
One can rotate the image in the preview window in version 0.70 or
later and view the image with xv.
Before the rotate feature was available in Xsane, I
used the rotate utility in the ImageMagick package. I had
created a bash function called prep so I could say:
prep 270 image.pnmto rotate the image 270 degrees and view it. While this was running, I removed the slide, and prepped the next slide.
Most of the time, scans are fine, but do view the scan and make sure there are not any annoying streaks or specks of dust in unfortunate places.
This is one area where I still do not have a lot of experience. My current techniques are limited to a couple of tools in the GIMP. However, it appears you can get a lot of mileage out of them.
Run gimp on your image and then bring up the Levels
dialog with Image->Colors->Levels. There is a histogram that
represents the color intensities in the image. There is typically no
values at either end of the extremes. Try the Auto Levels
button. If it does not do a good job, cancel and manually move the
black and white triangles so that they point at the minimum and
maximum values in the histogram respectively. Both Philip Greenspun
(see Using
Photoshop) and Dan Heller have recommended this action.
Dan goes on to bring up the Image->Colors->Hue-Saturation dialog and increase the saturation to brighten the colors. He may also tweak the hue if color correction is necessary.
After scanning a roll, I create a rough Web page that contains JPEG versions of the raw scans. I wrapped the steps in a bash function called scanstoweb. This function does the following:
xv -vsmap. I click the Update
button to generate thumbnail images for quick perusal of the raw scans
later. You are correct--this has nothing to do with the creation of
the Web page.
convert utility in ImageMagick. This is as wide as you
want to get if you are placing two images across the page since
horizontal scrolling is to be avoided. Some folks restrict the images
to 200 pixels wide.
width and height attributes to the
images with the wwwis script. This
helps browsers lay out the pages before the images arrive.
xcdroast and configure it in the Setup
screen.
Volume-ID: | 1993-wt-10 |
Publisher-ID: | Bill Wohler <wohler@newt.com> |
Preparer-ID: | Bill Wohler <wohler@.newt.com> |
Application-ID: | Bill & Speedy's 1993 Fais-toi Plaisir World
Tour |
I update the Volume-ID, which is like a label, for each roll but only update Application-ID, which is like a title, for each group of CDs. Click on Save as default.
I encountered few problems. Fortunately I found workarounds.
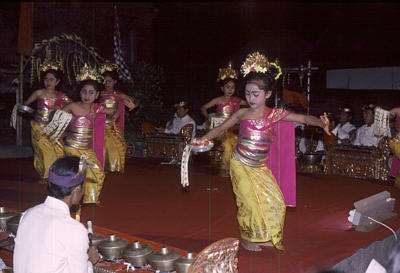
The first maddening problem was that I kept getting these colored streaks through the image such as those in the image at left. You can see the green streaks in the dancer's magenta cape. By dumb luck I discovered that if I removed all of the other devices from the bus, the streaks went away.
My friend Dan Heller thinks that had these streaks been red, it would have been caused by proximity to the monitor. The solution in this case would have been to remove the scanner and place it in a dark cool place for 24 hours and then reconnect it further away from the monitor. Since I found a simple workaround, which would seem to indicate that the monitor is not at fault, and placing the scanner far away from the monitor would hardly be convenient, I have not tried his advice. But I include it in case it helps someone else.
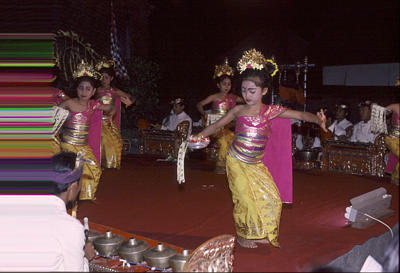
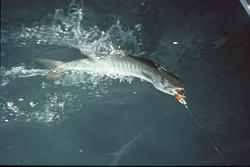
Later, I got a panned shot effect in the last fifth of the image. In other words, the pixel values were the same in each column for the last fifth of the image. My hunch is that the slide is slipping inside the scanner. A subsequent scan causes the slide to pop out rather than stay inside, so it has definitely gotten misaligned. This is either a problem with the particular batch of slides I have, which have a slippery plastic housing, or perhaps the scanner is defective and I should return it.
However, I discovered that if I rotate the slides 180 degrees, they scan just fine, as in the good shot below. So, I'm not sweating it.

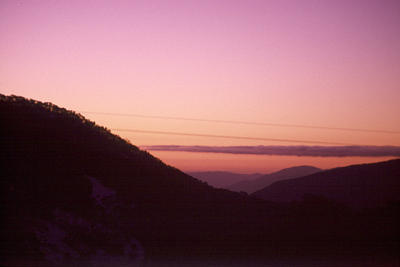
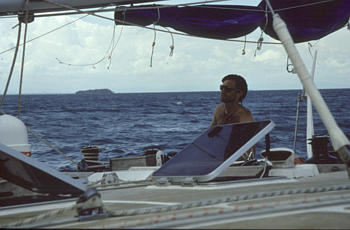
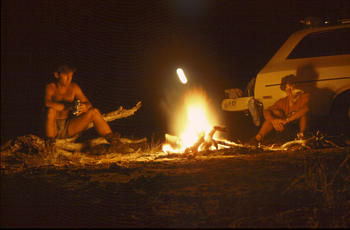
You can see the results of my learning experience in Bill & Speedy's 1993 Fais-toi Plaisir
World Tour. Remember that this collection includes all of the
slides, not a choice few, and that I have not performed any
post-production on the images, other than what was done in
Xsane described above.
In order to get a good objective evaluations of various scanners and issues, Tony Sleep's site is indispensable. There you can sign up for the filmscanners@.halftone.co.uk mailing list.
Although I went directly to HP to purchase my scanner, one store recommended to me was B&H Photo-Video-Pro Audio Homepage. You could also try Shopping.com or Amazon.
The software used on Linux is SANE. There you can sign up for the sane-devel@.mostang.com mailing list. The frontend is Xsane. The SCARSE scanner calibration software may be of use.
Other tools include the GIMP, ImageMagick, xcdroast for putting
your raw scans on CDs, wwwis for adding
width and height attributes to the images in
your Web pages.
There are several pages devoted to scanning and scanner and monitor calibration:
Before you can scan, you have to shoot. Here is a good introduction to photography techniques . The topics in the left gutter are generally arranged from basic to advanced. In particular, the Golden Mean, Rule of the Thirds, Framing, and Cross-Lines are directly related to composition.
|
Copyright © 2000, 2001 Bill Wohler Last modified: 2001 About photos |

Free DNS |